Step 1: Assess Your Needs
Understanding Your Environment
Before diving into construction, take a step back and evaluate your surroundings. What kind of disasters are common in your area? Flooding, tornadoes, or earthquakes? Knowing what you need to prepare for is crucial in deciding what your shelter should look like.
Once you have an idea, make a list of potential threats. This list will help you customize your shelter accordingly, focusing on what matters most. You’ll find that tailored approaches are often more effective and budget-friendly.
Furthermore, think about your household’s size and structure. If you have kids or pets, you’ll need to factor in additional space and supplies. Having a secure shelter is about comfort as much as safety.
Assessing Resources
After identifying your needs, look around your home and community for resources. You’d be surprised by what you might already have that could be repurposed. Old wooden pallets, scrap metal, or even sturdy furniture can provide a great foundation.
Consider talking to neighbors or local community groups as well; often, there are shared resources that can reduce costs for everyone involved. A community effort can really stretch your budget, not to mention, it builds a sense of camaraderie.
Lastly, make a rough budget. Determine how much you can afford to spend without breaking the bank. This way, you can prioritize what you need versus what would just be nice to have.
Setting Priorities
Look, I get it; the whole process can feel overwhelming. But by prioritizing, you can tackle it piece by piece. What absolutely needs to be done first? Is it fortifying the entrance, or is it ensuring you have a reliable way to communicate in an emergency?
Creating a timeline for each phase can keep things on track. Determining what must be done now and what can wait until later will give you a clear path forward. Trust me, it saves a ton of headache!
== > What if ... Get a FREE Subscription to PREPARE
Finally, be adaptable. Things change, and that’s okay! If you find a better way to do something, go for it. Budgeting is about flexibility as much as it is about hard numbers.
Step 2: Gather Materials
Choosing Affordable Supplies
When it comes to building your disaster shelter, you don’t need to splurge on brand-new materials. Check local classifieds, online marketplaces, or even thrift stores for supplies. You can find great deals!
I’ve had luck with places like Habitat for Humanity’s ReStores, where you can pick up building supplies for a fraction of the cost. Sometimes, they offer almost new items or surplus from construction projects. Talk about a win!
Don’t underestimate the power of creativity either; simple materials can be used in innovative ways. For instance, using water barrels for rainwater collection can double as a barrier and a supply source!
Recycling and Reusing
If you’ve got an eye for repurposing, you’re already ahead of the game. Look at what items you can recycle or reuse, like old tires, shipping containers, or even pallets for walls and storage. Those things are everywhere; you just have to look!
By reusing materials, not only do you save money, but you also contribute to sustainability—a win-win, right? Plus, it adds character to your shelter. Who doesn’t love a unique space?
Make sure you check local regulations though. Sometimes, recycled materials need to meet specific safety standards, so it’s a good move to check in on that beforehand.
Involving the Community
Don’t underestimate the power of a helping hand. Friends and family can be an invaluable resource. Maybe they’ve got tools you can borrow or leftover building materials from past projects.
Initiating a “build day” can also help. You might be surprised how many people are willing to lend a hand when they see you’re building something essential for safety. Plus, it’s a great way to boost morale!
And if there are local organizations focused on disaster preparedness, reach out! They may offer workshops or supplies to assist your project. You’d be surprised who might be willing to collaborate for the greater good!
Step 3: Design Your Shelter
Simple and Effective Design Principles
When designing your shelter, keep it simple. The more elaborate your design, the more costly it can become. Think of basic shapes like rectangles or squares—those are generally easiest to build.
Effective designs also account for ventilation and natural light. Airflow is crucial, even in a disaster scenario. You want folks to be safe but not feel like they’re stuck in a dark, cramped space.
Lastly, don’t forget about organization within your space! Having designated areas for supplies will save you time and stress when you need things the most. Get creative with how you store your necessities, and keep everything within easy reach.
Safety Features
When designing your shelter, safety features are paramount. Reinforcing doors and windows can be simple yet effective ways to minimize risks. Consider adding steel reinforcements or even using plywood as a temporary barrier.
Also, think about a way to make your shelter easily accessible during emergencies. Clear pathways are crucial for safety. It’s all about quick access if disaster strikes.
Another tip? Add an emergency kit area within your shelter. This little detail can make a world of difference! Ensure essentials are put together carefully and are easy to spot when adrenaline is high.
Personalization
Your shelter should reflect some aspects of home. While function is key, don’t forget comfort! Toss in a few personal touches—a cozy blanket or photo can boost spirits.
Get Preparedness and Self-Reliance Tips. Subscribe Now!
Use your creativity! Maybe you could add writings or drawings from your kids. It can transform a potentially scary environment into something familiar and less daunting.
Lastly, engage your family in the design process. Getting everyone involved makes it a team effort, and it’ll definitely help everyone feel more secure and invested in the final product.
Step 4: Build and Fortify
The Construction Process
Now comes the fun part—building! Begin by laying down a solid foundation. This could mean leveling the ground or laying concrete blocks, depending on available materials. You want a strong base to prevent issues later on.
As you start building walls and roofs, remember the importance of a hands-on approach. If you can enlist a friend or two for support, it can go faster and make the work seem lighter. Not to mention, it’s a great chance to bond over something meaningful.
While building, keep an eye out for weaknesses. Once the basic structure is up, it’s all about fortifying weak points to ensure your shelter can withstand forces of nature.
Protective Measures
After getting the main structure up, look into additional protective measures. Reinforcing windows with plywood or shutters can go a long way. You may even want to install storm doors as a way to be extra cautious.
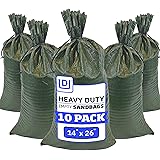
Consider investing in sandbags if you’re in a flood-prone area. They’re usually inexpensive and can be a lifesaver. Stacking them around your shelter can give you an added layer of security during heavy rains.
Lastly, look at landscaping options too. Strategic planting can serve as a barrier against wind or flooding. At the very least, it will make your shelter blend beautifully with the natural environment.
Testing Your Shelter
Once you’ve built your shelter, it’s time to test it. This could mean having a family ‘camp-out’ night in the shelter to gauge comfort and functionality. Check if supplies are easily accessible and if there’s sufficient space to move around.
Pay attention to potential leaks or drafts during any stormy weather. It’s one thing to plan for disasters and another to see how your shelter performs under pressure.
Make notes during your tests. If you notice any issues, take the time to tweak and adjust. This process will ensure that your disaster shelter is really ready when it counts.
Step 5: Plan for Long-Term Usage
Regular Maintenance
Once your shelter is built, don’t kick back just yet! You’ll want to conduct regular maintenance. This means checking for weather damage, replacing any worn materials, and ensuring everything is still secure.
Set a calendar reminder to inspect your shelter at least a couple of times a year. Keeping a close eye on your shelter can prevent small issues from becoming big headaches later.
Don’t forget about your emergency supplies either! Make sure they’re all up-to-date. Replace expired items and consider refreshing your supplies to keep everything current.
Community Involvement and Training
If your community holds disaster drills, participate! It’s invaluable to practice procedures rather than just planning them. Engaging in community training can offer practical insights into how your shelter can function as a community resource.
And who knows? You might inspire others to get involved! A little training can go a long way in making sure everyone in your community feels safe and prepared.
Plus, sharing knowledge helps create a stronger support network for when disaster does strike. Everyone can contribute their own tips and tricks!
Staying Updated
Lastly, stay updated with local emergency management protocols. Regularly check for any new resources, changes in safety procedures, or local regulations regarding shelters.
As we learn more about disaster preparedness, it’s important to incorporate those findings into your shelter plans. Knowledge changes, and so should your plans if necessary!
Join local social media groups or forums focused on disaster preparedness. They can provide valuable updates and tip-offs to help keep you informed on the best practices moving forward.
FAQ
1. What are the essential features of a disaster shelter?
Essential features include structural integrity, secure entrances, and proper ventilation. It’s also helpful to have an emergency kit and designated areas for supplies.
2. How can I begin building my shelter on a budget?
Start by assessing your needs, gathering materials, and recycling items you already have. Community involvement can also help reduce costs.
3. How often should I maintain my shelter?
It’s best to perform maintenance checks at least twice a year, ensuring everything remains secure and functional.
4. What should I include in my emergency supplies?
Your emergency supplies should include food, water, first-aid kits, tools, and any personal items and medications you might need.
5. Can I turn my shelter into a community resource?
Absolutely! Involving your community through training and drills can help everyone feel more prepared and makes your shelter a focal point for emergency preparedness.


