How to Build a Prepper’s Pantry That Lasts
- Sustainable Food Storage
- Choosing the Right Containers
- Essential Foods for Prepping
- Maintaining Your Pantry
Sustainable Food Storage
Understanding Shelf Life
When I first started my journey in prepping, I was overwhelmed by the terms like “shelf life” and “best by dates.” It’s super important to learn the different types of shelf life categories—some foods last longer than others, and knowing this can save you a lot of headaches. For instance, grains and pasta can last for years if stored properly, while canned goods might only last a couple of years.
Understanding how to read labels doesn’t just make you a better shopper; it makes you a savvy prepper. Dive into the nuances of expiration dates, like what “sell by,” “best by,” and “use by” actually mean. And don’t forget, just because something has passed its “best by” date doesn’t mean it’s garbage; many items can still be safe and good to eat well past those dates if stored right.
Finally, do your research on foods you’re curious about! Keeping a well-organized log of what you have and when you should use it is a real game changer. It keeps waste down and helps you manage your pantry better.
Optimal Storage Conditions
I’ve learned that the environment where you store your food is just as important as the food itself. You don’t want a pantry that gets too hot or humid—that’ll spoil your supplies faster than you can say “prepper.” Aim to keep your food in a cool, dark place. Believe me, basements are great for this.
If you’ve got a closet or a room that stays cool, that’s a bonus. Just like the way you wouldn’t leave chocolate in a hot car, you wanna keep your future meals in their perfect environment. Whether it’s ideal temperature or humidity levels, these factors make a huge difference.
Invest in a good thermometer and hygrometer to keep tabs on your storage conditions. It’s a little bit of money that’ll pay off in the long run by helping you maintain optimal storage conditions.
Rotating Your Stock
Now comes the fun part—rotation! As you stock up, make sure the older items are at the front and the new stuff is at the back. I can’t stress enough how beneficial this method is—it’s like the grocery store moves into your pantry!
== > What if ... Get a FREE Subscription to PREPARE
Regularly inspect your food stock, and as you consume things, replace them to keep your pantry perpetually stocked with fresh supplies. I often set a reminder on my phone each month to check and organize my pantry. This little habit goes a long way.
Plus, being in touch with what I have on hand helps avoid any panic buying later on. You’ll know what needs to be used up and what you still want to hold onto for future meals!
Choosing the Right Containers
Glass vs. Plastic
Let’s chat about containers—this was a huge learning curve for me! Both glass and plastic have their pros and cons. Glass containers are fantastic because they don’t reach into the pesky chemical leaching zone. But I know glass can be heavy and breakable; they’re not always ideal for every situation.
On the other hand, plastic can be super lightweight and shatterproof, but the quality of plastic matters. Choose BPA-free options, because being conscious of what goes into our bodies should always be priority number one. Trust me; it’ll be worth it.
Buckets and vacuum-sealed bags are great storage methods, too. When dealing with bulk items, buckets keep things fresh and sealed away from pests. Just make sure to label everything! I’ve learned the hard way when I grabbed what I thought were oats—and it turned out to be wheat berries. Oops!
Labeling and Organization
Labeling containers seems so simple, but it actually saves you a ton of time and reduces food waste. Create a system that works for you—most people go the classic route with a marker, but I like to use colorful sticky labels! It’s a happy touch that makes my pantry feel cheerful.
Organizing your pantry isn’t just about aesthetics; it’s practical. Put similar foods together, like grains, pasta, and canned goods. This way, when you’re preparing meals, you can easily find what you need without rummaging around.
I also group items based on how often I use them. Less frequent items can go to the back, while the everyday essentials stay front and center. It saves on frustration and gets me cooking faster.
Sealing Methods
Sealing is super important. There are all these nifty devices out there like vacuum sealers that take the air out of bags and keep food fresh longer. I didn’t think this was necessary until I tried it—what a difference!
Consider using mylar bags for long-term storage; they block light, moisture, and oxygen. If you haven’t tried them yet, just know they’ll keep your grains and dehydrated fruits fresher for way longer.
Remember, proper sealing not only extends shelf life but reduces the chances of pests. Rodents? No thank you! Keeping those little guys out of your food is a win-win.
Essential Foods for Prepping
Pantry Staples
Alright, now let’s break down the essential foods you’ll want in your prepper’s pantry. First things first, you can’t go wrong with grains—rice, pasta, oats—these are super versatile and filling. I love to make a big pot of rice at the start of the week; it can be a side dish or mixed into a hundred different meals.
Then come the legumes—beans, lentils, and chickpeas. They’ve got protein galore, and most can last a long time if you store them right. Plus, they’re fantastic in soups, salads, and stews.
Don’t forget about canned goods! Look for a variety of vegetables, fruits, and proteins like tuna or chicken. I find that canned tomatoes are a lifesaver in many recipes. Just throw them in a pot with some spices, and boom—a meal is born!
Freeze-Dried and Dehydrated Foods
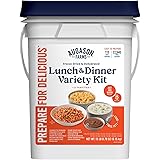
Freeze-dried foods are absolute gems in my pantry. They last forever and maintain their nutrients. Whenever I want a quick backpacking meal, I can just toss some in water, and I’m good to go. It’s like having a meal in a bag!
Dehydrated foods are another solid option. Fruits and veggies that are dried can add a burst of flavor to your meals. Not to mention, they save space since they’re lightweight! Perfect for anyone looking to maximize their food storage.
Exploring these types of foods opened me up to a whole new world of prepping! The variety of shapes, sizes, and nutrients keep meals interesting even when you’re stocked for the long haul.
Snacks and Treats
Sometimes prepping can seem all about the necessities; don’t forget to also stash away some snacks! What’s a pantry without a little fun? I always throw in some nuts and dried fruits—they not only taste great, but they’re also packed with energy.
Baking items like flour and sugar are a must. Nothing beats freshly baked bread, right? Plus, they also store for a decent amount of time when held properly.
Lastly, don’t underestimate having some comfort food stashed away—think chocolate or granola bars. They can really lift your spirits when the going gets tough. I might not always be in a prepping mindset, but having those treats ready gives me peace of mind! They’re like a personal cheerleader in a bottle.
Maintaining Your Pantry
Regular Inspection
Keeping up with maintenance of your pantry is essential, and it genuinely doesn’t take much effort. I found the best way is to set a regular inspection date—perhaps once a month. During these checks, I look for anything nearing its expiration date and re-arrange as needed.
When inspecting, don’t just look at the food, but check the containers too. Look for any signs of moisture or pests. If something seems off, it’s better to deal with it sooner rather than later. No one wants an infestation or stale food!
This simple act keeps my pantry from becoming a time bomb of expired supplies. It’s peace of mind knowing that I’m not overlooking anything and that my food supplies are in tip-top shape!
Cleaning and Organizing
Cleaning isn’t just an afterthought; it’s an integral part of maintaining a healthy pantry. I usually wipe down shelves every couple of months to keep them dust-free. When I switch out items, that’s when I take the time to give it thorough cleaning.
Organizing should be a continual process. Every time I restock, I make sure to rearrange things based on how they’re used in my daily cooking. Being intentional about this not only keeps things fresh but makes it easy to whip up a meal in no time.
A tidy pantry is a happy pantry; it helps me stay motivated and excited about trying new recipes. Plus, it’s impressive when friends check it out, and they see my fun way of organizing!
Keeping It Fun
Lastly, I try to keep my prepper pantry an enjoyable aspect of my life. I find myself checking out new recipes based on what I have. This keeps things interesting and motivates me to use my pantry to its fullest potential.
Trying out new foods or treats also makes me look forward to inspecting and maintaining my pantry. You’ll be surprised how community-friendly items can turn a solo venture into a group activity.
Share your journey with family and friends. Host a cooking night and use items from your pantry. Just make it a fun, conscious aspect of daily life, and you’ll see how it elevates everything you do in terms of prepping!
FAQ
What types of food should I prioritize for my prepper pantry?
Focus on non-perishable staples like grains (rice, pasta), beans, canned goods, and dehydrated or freeze-dried items. Snacks and comfort food shouldn’t be missed either!
How often should I check my prepper pantry?
It’s a good idea to check it at least once a month to inspect for expiration dates and overall condition. This helps ensure that everything remains fresh and in good shape.
Is it necessary to have both glass and plastic containers?
Having both is beneficial! Glass is great for long-term storage and preserves food quality, while plastic is lightweight and portable for short-term use. Choose what works for YOU!
Can I store my prepper pantry in a garage or attic?
It’s not ideal. These locations can frequently experience temperature fluctuations, which isn’t good for your food. Keeping your supplies in a cool, dark area in the house is best. Aim for a basement or closet instead!


